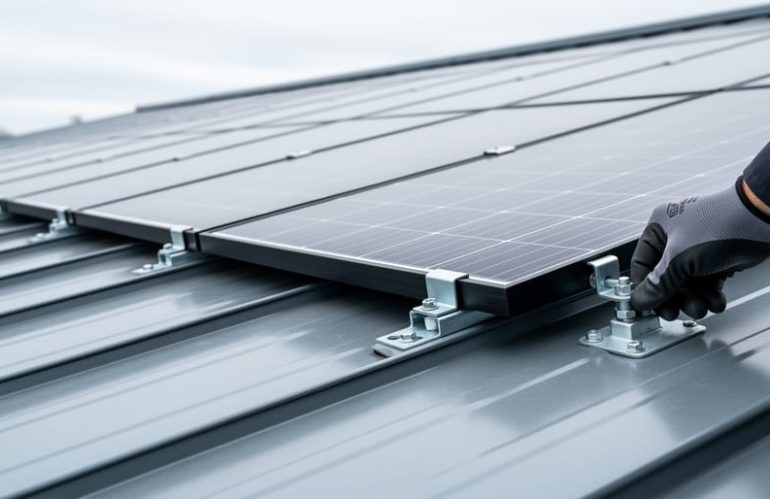
Solar panel installation on metal roofs is not only feasible but often preferred over traditional shingle applications, delivering superior long-term performance through specialized aluminum mounting systems that require no roof penetrations. The process typically takes one to three days for a residential or light commercial project, depending on roof complexity and array size, and demands precise attention to panel orientation, electrical code compliance, and metal-specific fastening methods that preserve the roof’s structural and weather-sealing integrity.
Metal roofing substrates offer distinct advantages for solar installations. The material’s durability matches or exceeds the 25 to 30-year lifespan of photovoltaic modules, eliminating the need for mid-life roof replacement common with asphalt shingle installations. Standing seam profiles accept clamp-based mounting hardware that avoids drilling through the weatherproof membrane entirely, while corrugated and trapezoidal profiles accommodate through-fastened brackets with proper flashing and sealant protocols. Both approaches require engineered mounting systems that account for thermal expansion coefficients, wind uplift loads, and the gauge-specific load capacity of the underlying metal panels.
The critical distinction in metal roof solar installations lies in substrate-specific hardware selection and attachment methodology. Standing seam systems use non-penetrating clamps that grip the raised seam profile, distributing load across multiple attachment points without compromising the roof envelope. Exposed-fastener roofs demand stainless steel or aluminum brackets anchored to structural purlins or decking, each penetration sealed with EPDM washers and compatible sealants rated for continuous UV exposure and thermal cycling. Proper execution of these techniques ensures warranty preservation for both roofing and solar components while maximizing energy production through optimized tilt angles and azimuth orientation tailored to site-specific solar access conditions.
Why Metal Roofs Are Ideal for Solar Panel Installation
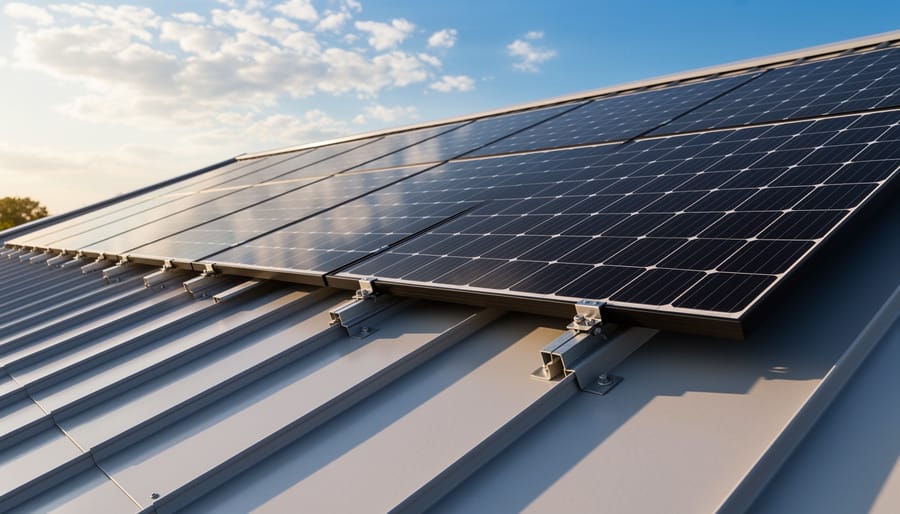
Metal roofs represent the optimal substrate for solar panel installations, delivering advantages that extend well beyond simple compatibility. The structural and material properties of metal roofing align precisely with the technical requirements and long-term performance expectations of modern solar arrays.
The longevity alignment between metal roofing and solar systems creates a unique installation advantage. Quality metal roofs typically last 50-70 years, matching or exceeding the 25-30 year warranties on solar panels and the 40+ year actual service life of photovoltaic systems. This synchronization eliminates the costly disruption of removing and reinstalling solar arrays for roof replacement, a significant concern with asphalt shingle roofs that require replacement every 15-20 years. Property owners installing solar on metal roofs make a single structural decision that supports energy generation for decades without interim roof maintenance interfering with system operation.
Structural capacity gives metal roofs a clear performance edge. Most metal roofing systems easily support the 2.5-4 pounds per square foot added by solar arrays without requiring additional structural reinforcement, particularly on commercial applications with engineered trusses. The rigid profile and corrugation patterns provide inherent stiffness that distributes panel weight effectively across the roof structure.
Standing seam metal roofs offer non-penetrating mounting solutions that preserve roof warranty and weather-tightness. Specialized aluminum clamps attach directly to the raised seams without drilling, creating secure attachment points while maintaining the roof’s original waterproof membrane. This approach eliminates the leak risks and warranty complications associated with penetrating attachment methods required on other roofing materials.
The environmental profile strengthens metal’s position as the ideal solar substrate. Metal roofing contains 25-95% recycled content and remains fully recyclable at end of service, complementing solar energy’s sustainability goals. The cool roof properties of reflective metal surfaces reduce cooling loads by 10-25%, creating compounding energy savings when paired with solar generation. This material synergy appeals to architects and developers pursuing net-zero building certifications and LEED credits.
Pre-Installation Assessment and Planning
Before installing solar panels on a metal roof, thorough assessment and planning prevent costly mistakes and ensure long-term system performance. Property owners and contractors must evaluate structural capacity, existing roof conditions, and regulatory requirements well before ordering equipment or scheduling installation crews.
Structural load capacity analysis serves as the foundation of any metal roof solar project. Metal roofing systems typically handle additional loads better than asphalt shingles due to superior strength-to-weight ratios, but precise calculations remain essential. Commercial buildings especially require licensed structural engineers to verify that existing framing, purlins, and roof decking can support not just the static weight of panels and mounting hardware, typically 3-4 pounds per square foot for residential systems, but also dynamic wind and snow loads specific to your climate zone. Residential projects in most jurisdictions can proceed with manufacturer load tables, though engineered assessments eliminate guesswork for older structures or heavy snow regions.
Roof condition assessment determines whether installation should proceed immediately or wait for repairs. Inspect the metal substrate for corrosion, loose fasteners, damaged panels, and compromised weatherproofing, solar arrays last 25-30 years, so the roof underneath must match that lifespan. Standing seam roofs in good condition accept non-penetrating seam clamps that preserve waterproof integrity, while exposed-fastener and corrugated profiles may require sealed penetrations or complete roof replacement before installation. Document the roof profile type now, since mounting strategies differ significantly across standing seam, R-panel, and corrugated designs, each demanding specific attachment hardware for best mounting applications.
Optimal panel placement and orientation directly impact energy production for decades. South-facing roof planes in the northern hemisphere capture maximum sunlight, though east-west splits work for buildings with high morning and evening consumption. Calculate shading from nearby structures, trees, chimneys, and roof penetrations using solar pathfinder tools or software modeling, even partial shade on one panel reduces string output. Mark electrical conduit routes from the array location to the inverter and main service panel, keeping wire runs under 100 feet when possible to minimize voltage drop.
- Structural engineering review confirming load capacity for panels, mounting rails, and climate-specific wind/snow forces
- Local building code compliance including setback requirements, fire access pathways, and electrical code adherence
- Utility interconnection application and net metering agreement approval before purchasing equipment
- Roof and solar panel warranty verification ensuring installation methods won’t void manufacturer coverage
- Permitting timeline assessment allowing 4-8 weeks for plan review in most jurisdictions
Electrical system planning requires evaluating your main service panel capacity, available breaker spaces, and whether upgrades are needed to accommodate the solar backfeed breaker. Residential systems typically need 200-amp service; undersized panels must be upgraded before solar installation. Commercial projects demand coordination with utility engineers months in advance for transformer upgrades and grid interconnection studies. Secure all building permits and utility approvals before ordering materials, installation timelines depend on regulatory processing, not just crew availability.
Required Tools, Materials, and Equipment
Successful metal roof solar installation demands specialized equipment beyond standard construction tools. This section details the essential items required for a professional-grade installation across different metal roof types.
Mounting Hardware and Structural Components
The foundation of any metal roof solar array begins with substrate-appropriate mounting systems. For standing seam roofs, non-penetrating clamps attach directly to raised seams without compromising roof integrity. These clamps accommodate seam widths from 1 to 2 inches and must match your specific profile geometry. Extruded aluminum rail systems provide the mounting platform for panels, offering superior corrosion resistance and thermal stability compared to steel alternatives. Rails typically come in 8 to 12-foot lengths with pre-drilled attachment points and integrated grounding channels.
Corrugated and exposed-fastener roofs require L-feet or direct-mount brackets that penetrate the substrate. These must include EPDM rubber or butyl gaskets and sealant-compatible backing plates to maintain weatherproofing. Long Metal Solar Roofing manufactures custom aluminum mounting brackets engineered for non-standard profiles, ensuring proper load distribution and ISO-certified durability across uncommon roof geometries.
Electrical Components and Safety Equipment
Essential electrical materials include UV-rated PV wire (typically 10 AWG for residential, 8 AWG for commercial arrays), MC4 connectors rated for outdoor exposure, aluminum conduit sized per electrical code, and a grounding electrode system. Your inverter and DC disconnect switch must match system voltage and current specifications.
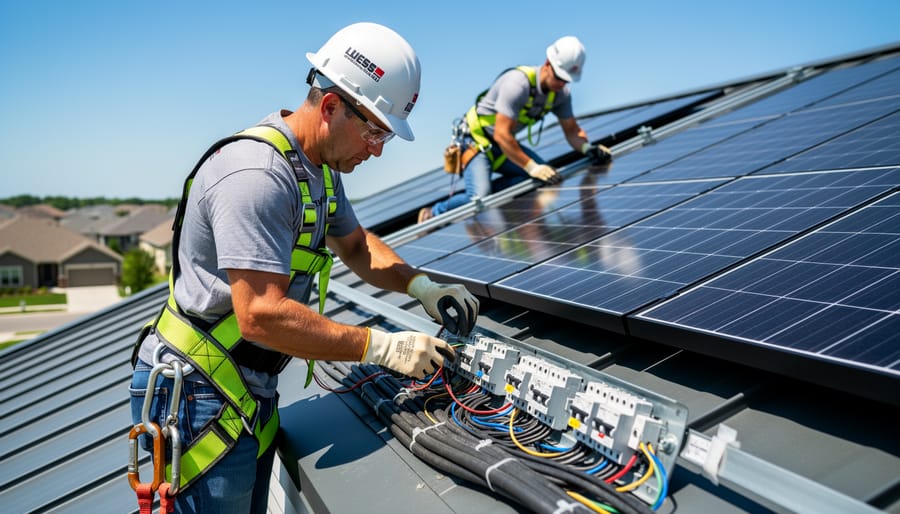
Safety equipment is non-negotiable: OSHA-compliant fall arrest systems with roof anchors rated for metal substrates, insulated gloves rated for DC voltage levels you’ll encounter, non-slip footwear, and hard hats. Metal roofs become dangerously slippery when wet or dusty.
Specialized Installation Tools
You’ll need torque wrenches calibrated to manufacturer specifications for clamp and bracket tightening, a digital multimeter for electrical verification, crimping tools for wire terminations, and metal-specific drill bits with pilot points if penetrations are required. Panel lifts or hoisting systems prove essential for commercial installations where manual handling creates excessive fall risk.
Critical Safety Requirements and Warnings
Metal roof solar installation demands strict adherence to safety protocols because you’re working at height on potentially slippery surfaces while managing high-voltage DC electrical systems. Fall protection is non-negotiable: use a properly rated harness with shock-absorbing lanyards anchored to structural roof members, never to the solar mounting hardware or standing seam clips. Metal roofing becomes extremely slippery when wet, frosted, or covered with morning dew, and thermal expansion causes panels to shift throughout the day, creating unexpected movement underfoot.
Electrical safety requires specialized knowledge of DC systems, which behave differently than household AC current. DC voltage remains live even after disconnecting inverters, and improper handling can cause sustained arcing that AC systems don’t produce. Always wear insulated gloves rated for the system voltage, use insulated tools, and verify circuits are de-energized with a multimeter before touching any connections. Work only during daylight hours when you can clearly see wire polarity markings and connection points.
Proper personal protective equipment extends beyond fall protection: wear non-slip boots with electrical hazard ratings, safety glasses, and gloves suitable for both cut protection and electrical insulation. Metal roofs require attention to roof profile compatibility when selecting anchor points, as corrugated profiles offer different load distribution than standing seam systems. Engage structural engineers for commercial buildings or any residential installation exceeding 10kW to verify load capacity, aluminum mounting systems add approximately 3-5 pounds per square foot including panels, which some older structures can’t safely support.
Step-by-Step Metal Roof Solar Panel Installation Process
Step 1: Layout and Measurement
Accurate layout establishes the foundation for a successful installation. Begin by measuring the available roof area using a laser distance meter or measuring tape, documenting all dimensions including roof length, width, and any obstructions such as vents, chimneys, skylights, or HVAC equipment. Create a scaled diagram showing these elements with precise distances from roof edges and ridges.
Design your panel layout to maximize array output while maintaining required setbacks. Most jurisdictions mandate 18-36 inches from roof edges for fire access pathways. Arrange panels to form complete electrical strings based on your inverter specifications, typically 8-12 panels per string for residential systems. Account for shade patterns throughout the day, positioning panels to avoid shadows that drastically reduce output.
On metal roofs, thermal expansion is significant. Steel and aluminum expand and contract with temperature changes, so mark mounting locations with 1-2 inch tolerance zones rather than fixed points. For standing seam roofs, identify seam locations and verify consistent spacing. Mark your first rail position, then use that reference to establish parallel lines for remaining rails, checking alignment every 10 feet to prevent cumulative error.
Step 2: Install Mounting Rails and Attachments
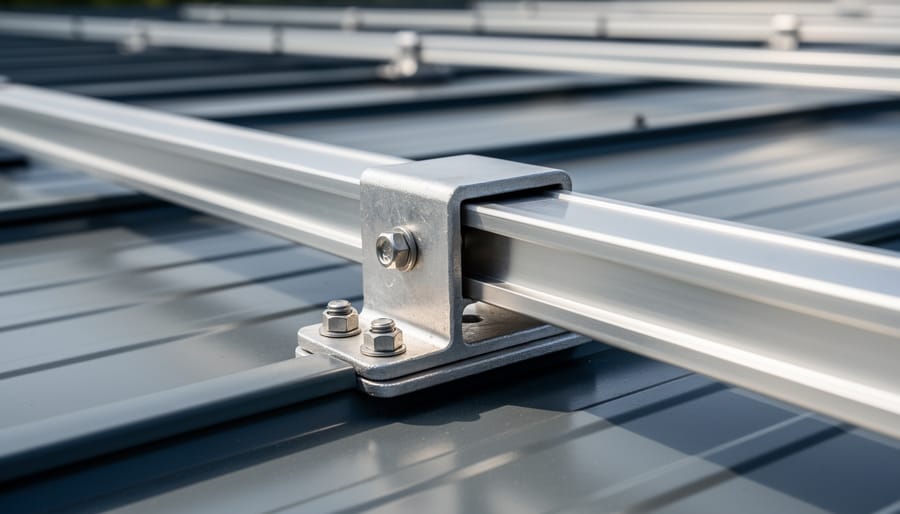
Begin by selecting mounting hardware appropriate for your metal roof profile. Standing seam roofs use non-penetrating clamps that grip the seam without drilling, preserving the roof’s watertight integrity and warranty. These clamps slide onto the vertical seam and secure with set screws torqued to manufacturer specifications, typically 10-15 ft-lbs for aluminum clamps. Over-tightening can deform the seam or crack the clamp; under-tightening risks lateral movement during wind events.
For exposed fastener or corrugated roofs, use sealed L-feet or specialized brackets that require penetrations. Position each L-foot over a structural purlin, never between them, and predrill pilot holes slightly smaller than the fastener diameter. Apply butyl tape or elastomeric sealant beneath the bracket base before fastening. Use stainless steel lag screws with EPDM washers, torqued to 30-35 ft-lbs to compress the seal without stripping threads.
Install extruded aluminum rails perpendicular to roof seams or ribs, spacing them according to panel dimensions and wind load calculations. Most systems require rails every 48-60 inches. Include thermal break pads between clamps and rails where dissimilar metals contact, preventing galvanic corrosion and accommodating expansion rates that differ by 0.003 inches per degree Fahrenheit per foot of rail length.
Verify rail alignment using a laser level or string line. Parallel rails must maintain consistent spacing within 1/8 inch across the array to prevent panel installation difficulties and stress concentrations that void warranties.
Step 3: Electrical Conduit and Wiring Preparation
Electrical conduit installation begins before mounting panels, establishing the pathway for DC power from the array to the inverter location. Run electrical metallic tubing (EMT) or Schedule 40 PVC conduit from the planned array location down to the inverter mounting point, typically on an exterior wall or in a utility room. Secure conduit to the metal roof surface using appropriate standoffs that accommodate thermal movement, metal roofs expand and contract significantly with temperature changes, and rigid conduit attachments can fail or cause roof damage.
Plan wire runs to minimize exposure and maintain NEC-compliant bending radius for PV wire, typically six times the cable diameter. Install a DC disconnect switch at a readily accessible location between the array and inverter, as required by electrical code. This safety device allows the system to be de-energized during maintenance or emergencies.
Ground the aluminum mounting rail system by bonding it to the building’s grounding electrode system. Use listed grounding lugs specifically rated for aluminum-to-copper connections to prevent galvanic corrosion. Run a grounding conductor through the same conduit path or use an approved alternative routing method, maintaining continuous electrical bonding across all rail sections and roof penetrations.
Step 4: Mount Solar Panels to Rail System
Begin at one end of the rail system and work systematically across the array. Install end-clamps at the outer edges of the first and last panels in each row, securing them to the aluminum mounting rails with stainless steel bolts. Position the first solar panel onto the rails, ensuring the frame sits flush against the end-clamp. Verify the panel is level using a digital level before tightening fasteners.
Use mid-clamps to secure adjacent panel edges, placing one clamp between every two panels. Maintain the manufacturer-specified gap between panels, typically 10-15mm, to allow for thermal expansion and contraction. This spacing is critical on metal roofs where both the aluminum rails and panels experience significant temperature fluctuations throughout the day.
Tighten all clamp bolts to the manufacturer’s specified torque values using a calibrated torque wrench. Over-tightening can crack panel frames or strip aluminum threads, while under-tightening risks panel movement during wind events. Most residential panels require 12-16 Newton-meters of torque. Work methodically row by row, double-checking level alignment and gap spacing as you progress. Ensure no panels rock or shift when manually tested before proceeding to electrical connections.
Step 5: Complete Electrical Connections
Electrical connections demand precision and adherence to the National Electrical Code. Begin by connecting solar panels in the planned series-parallel configuration using MC4 connectors, push the male and female connectors together until you hear an audible click, ensuring weather-tight seals. Verify correct polarity at every connection point using a multimeter; reversed polarity causes immediate system failure and potential equipment damage.
Route positive and negative home run cables through the installed conduit system to the combiner box or inverter location. Connect the aluminum mounting rail system to the grounding electrode system using appropriately sized copper conductors and approved clamps, proper grounding protects against lightning strikes and electrical faults. All metallic components, including rails and panel frames, must establish continuous electrical ground.
Wire the DC disconnect switch between the array and inverter, clearly labeling all terminals. Connect DC input cables to the inverter following manufacturer specifications for torque and wire gauge.
Critical requirement: Only licensed electricians should complete AC-side connections from the inverter to the main service panel and utility interconnection. This work involves live electrical systems, requires proper permitting, and must pass inspection before system activation.
Metal Roof Type-Specific Installation Considerations
Understanding the distinct characteristics of different metal roof types is essential for selecting appropriate mounting hardware and installation techniques.
Standing seam metal roofs offer the most straightforward solar installation path. The raised vertical seams accept non-penetrating S-5! clamps or similar aluminum brackets that attach directly to the seam without drilling holes. These clamps slide onto the standing seam profile and tighten with set screws, maintaining complete roof waterproofing integrity. The standing seam benefits include faster installation times (typically 20-30% quicker than penetrating systems) and preserved manufacturer warranties. Long Metal Solar Roofing manufactures extruded aluminum mounting rails with integrated clamp channels that distribute panel loads across multiple seams, accommodating thermal movement while meeting structural load requirements. Seam spacing typically ranges from 12 to 24 inches, dictating rail layout and clamp frequency.
Corrugated and ribbed panel roofs require penetrating attachment methods since they lack raised seams. Installation uses L-feet or universal brackets that bolt through the panel crown or flat sections directly into structural purlins. Each penetration must be sealed with EPDM washers and high-grade sealant to prevent water infiltration. The corrugated vs seam comparison reveals that corrugated installations demand precise purlin location mapping and more extensive sealing procedures. Custom extruded aluminum brackets can be designed to match specific corrugation profiles, ensuring flush mounting and optimal load transfer. Plan for approximately 4-6 mounting points per 8-foot rail section.
Metal shingle and tile roofs present the greatest installation complexity. These roofs often require specialized hook-style brackets that slide beneath individual shingles or tiles, anchoring to the deck structure. The irregular surface geometry demands careful rail leveling and shimming. For non-standard profiles, Long Metal Solar Roofing provides custom-machined aluminum mounting solutions that accommodate unique panel geometries while maintaining structural integrity. These installations typically require 30-40% more mounting hardware than standing seam projects and benefit from engineered drawings specific to the roof profile.
Verification, Testing, and System Commissioning
Once panels, rails, and wiring are in place, methodical verification ensures the system operates safely and meets code requirements before energization. This phase protects your investment and satisfies utility interconnection standards.
Begin with mechanical inspection. Walk the array and verify every mounting clamp or bracket is torqued to specification, loose hardware compromises structural integrity and creates future leak points on standing seam roofs. Check that aluminum rails remain level and parallel, with consistent panel gaps (typically 0.5 inches) allowing thermal expansion. Inspect all roof penetrations on corrugated or exposed-fastener systems for proper sealant application and flashing integrity; water intrusion voids warranties and damages substrates.
The electrical verification sequence follows a specific order to confirm safe, code-compliant operation:
- Test string continuity with a multimeter before connecting to the inverter, confirming each series has unbroken current paths and no short circuits.
- Verify polarity at every MC4 connection using a DC clamp meter or polarity tester, reversed connections damage inverters immediately upon energization.
- Measure open-circuit voltage (Voc) for each string under sunlight; readings should match manufacturer specifications within 5% tolerance, indicating proper panel quantity and healthy cells.
- Check grounding electrode system resistance with a megohmmeter; values under 25 ohms satisfy NEC requirements for system safety, protecting against lightning and fault currents in aluminum rail systems.
- Commission the inverter per manufacturer protocols, programming grid parameters and enabling monitoring features, then observe stable operation for 30 minutes while logging output data.
- Document all test results, torque values, and as-built wiring diagrams; utilities and inspectors require this paperwork for permission to operate (PTO) approval.
Schedule the authority having jurisdiction (AHJ) final inspection before grid connection. Inspectors verify code compliance, proper labeling of DC disconnects and rapid shutdown controls, and accurate single-line diagrams. After passing inspection, submit interconnection paperwork to your utility, PTO typically arrives within two weeks, authorizing meter replacement and system energization. Retain all documentation, including rail manufacturer certifications and panel datasheets, to activate equipment warranties and satisfy future insurance or property transfer requirements.
Long-Term Maintenance and Warranty Considerations
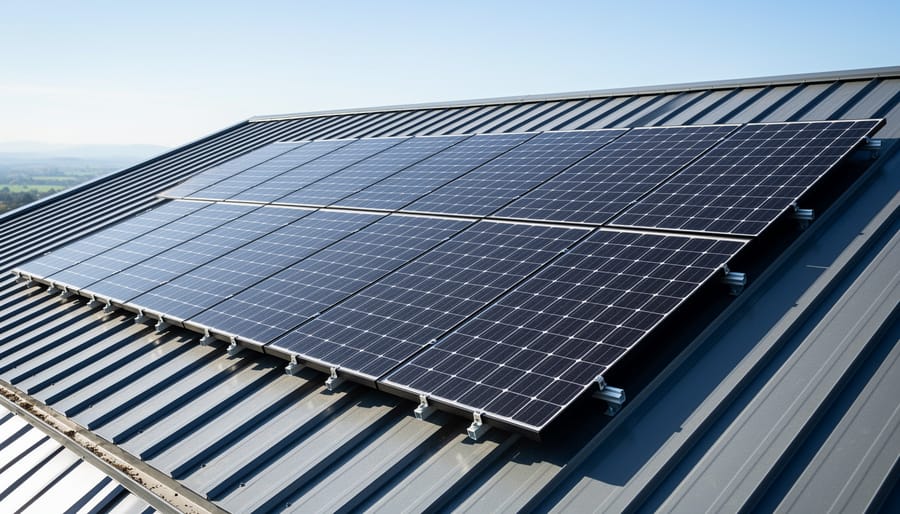
Metal roof solar installations require minimal maintenance but benefit from systematic care. Schedule biannual visual inspections, spring and fall, to check mounting hardware torque, examine aluminum rail integrity, and identify any debris accumulation or panel damage. These twice-yearly reviews catch small issues before they escalate.
Clean panels when dust or pollen reduces output, typically once or twice annually. Use soft brushes or low-pressure water to avoid scratching panel surfaces or dislodging roof coatings. Never walk directly on metal roofing; use proper scaffolding or safety equipment. Clean early morning or late evening when panels are cool to prevent thermal shock.
Aluminum mounting systems offer exceptional durability. Extruded aluminum rails resist corrosion in coastal and industrial environments far better than steel alternatives. Look for ISO 9001-certified manufacturers whose profiles maintain structural integrity for decades. Properly installed systems require no re-torquing or hardware replacement under normal conditions.
Document your installation thoroughly to preserve warranties. Most solar panel warranties require professional installation and prohibit unauthorized modifications. Metal roof warranties typically remain valid if mounting systems are non-penetrative or use approved sealed fasteners. Keep installer certificates, component specifications, and inspection records. Both roof and solar manufacturers may deny claims if installation deviated from their requirements or if maintenance was neglected. Regular professional inspections every three to five years provide verification that systems remain compliant and functional, protecting your warranty coverage and long-term investment.
Common Installation Challenges and Solutions
Metal roof solar installations present several technical challenges that demand specialized solutions and careful planning. Understanding these obstacles before you begin can prevent costly mistakes and ensure long-term system performance.
Thermal expansion represents one of the most critical yet overlooked issues. Metal roofing expands and contracts significantly with temperature changes, up to several inches on large commercial buildings. Aluminum mounting rails experience similar movement. The solution lies in using specialized slotted mounting hardware that allows controlled movement while maintaining secure attachment. Long Metal Solar Roofing’s extruded aluminum systems incorporate expansion joints and slotted clamp designs that accommodate this movement without stressing fasteners or panel frames. Never over-torque clamps, as this restricts necessary thermal movement and can crack panel frames or distort roof seams.
Roof penetrations on corrugated or R-panel roofs create waterproofing challenges that standing seam installations avoid. When penetrations are unavoidable, use L-feet or mounting brackets specifically engineered with integrated EPDM sealing gaskets and butyl tape barriers. Position each fastener at the high point of a rib, never in valleys where water pools. Apply two layers of sealant: one beneath the foot and another over the fastener head. Custom-machined aluminum brackets that match your exact roof profile provide superior surface contact and weather resistance compared to universal hardware.
Wire routing becomes complicated on multi-plane or obstructed roof surfaces. Rather than forcing conduit across roof features, plan junction box locations that minimize exposed wire runs. Use weatherproof boxes rated for outdoor exposure and secure conduit runs with clips designed for metal roofing that won’t compromise panel integrity or create leaks.
Professional installers commonly face these obstacles:
- Coordinating solar installation timing with planned roof replacement to avoid removing and reinstalling arrays
- Accessing accurate structural load data for older buildings where original engineering documentation is missing
- Managing code compliance across multiple jurisdictions for commercial projects spanning several buildings
- Sourcing mounting hardware for discontinued or non-standard metal roof profiles
- Preventing galvanic corrosion when mixing dissimilar metals in the mounting assembly
The most effective approach combines upfront planning with access to customizable mounting solutions. Manufacturers offering bespoke aluminum extrusions can fabricate brackets that precisely match unusual roof geometries, eliminating the compromises inherent in forcing standard hardware onto non-standard substrates. This customization capability, combined with corrosion-resistant materials and proper installation techniques, transforms potential obstacles into manageable technical details.
When solar installation must occur on an aging metal roof, coordinate with roofing contractors to assess remaining service life. Installing a 25-year solar array on a roof with ten years remaining creates an expensive reinstallation project. In such cases, completing roof replacement first, or selecting mounting systems designed for easy future removal, represents the sustainable, cost-effective choice.
Frequently Asked Questions
Can you install solar panels on any metal roof?
Solar panels can be installed on most metal roof types, including standing seam, corrugated panels, and metal shingles, though the mounting approach differs significantly between profiles. Standing seam roofs offer the cleanest installation with non-penetrating clamps, while exposed fastener roofs require specialized brackets with proper sealing to maintain waterproofing.
Do you have to penetrate a metal roof for solar installation?
Standing seam metal roofs do not require penetrations since mounting clamps attach directly to the raised seams without drilling. Corrugated and exposed fastener roofs typically need sealed penetrations with flashed mounting feet, though proper installation with butyl sealant and neoprene washers maintains complete weather-tightness when executed correctly.
How long does a typical metal roof solar installation take?
A residential metal roof solar array typically takes two to four days to complete, including mounting system installation, panel placement, and electrical connections. Commercial installations require longer timeframes depending on array size, with standing seam installations generally progressing faster than corrugated roof projects due to simplified attachment methods.
What happens to the solar array if the roof needs replacement?
Solar panels must be removed before roof replacement, which adds cost but is simplified by the modular nature of rail-mounted systems. Because metal roofs often outlast solar panel warranties by 20-30 years, this scenario rarely occurs when both are installed new, making metal roofs the most cost-effective long-term substrate choice.
How do aluminum mounting systems perform over the panel lifetime?
Extruded aluminum rail systems resist corrosion in all climates and maintain structural integrity for 50-plus years, matching or exceeding both metal roof and solar panel lifespans. ISO-certified aluminum profiles provide superior durability compared to steel alternatives while accommodating thermal expansion without degrading attachment points or compromising roof seals.
Can mounting systems be customized for unusual roof profiles?
Manufacturers specializing in aluminum extrusion can design custom brackets and rail profiles for non-standard metal roof geometries, including proprietary panel systems and historic renovation projects. Custom solutions maintain the same structural performance and corrosion resistance as standard profiles while ensuring proper fit and code compliance for unique installation requirements.
Beyond these common questions, property owners often inquire about sustainability credentials for mounting hardware. Aluminum mounting systems carry environmental advantages through their recyclability and lower embodied energy compared to galvanized steel alternatives. Manufacturers with documented sustainability practices and third-party certifications provide transparency about material sourcing and lifecycle impacts, which matters increasingly for commercial projects pursuing green building certifications. When evaluating installation proposals, verify that contractors specify mounting hardware with clear material certifications and performance testing documentation rather than generic components lacking verifiable standards compliance.
Metal roofs represent the optimal substrate for solar panel installations when you combine proper materials with proven installation techniques. The structural advantages, durability, load-bearing capacity, and compatibility with non-penetrating mounting systems, make metal roofing the preferred choice for both residential and commercial solar projects.
Success hinges on three critical elements. First, quality aluminum mounting systems engineered specifically for metal roof profiles ensure structural integrity and thermal management across decades of service. Second, professional installation that strictly adheres to manufacturer specifications protects both your roof warranty and system performance. Third, ISO-certified components provide the quality assurance and corrosion resistance necessary for long-term reliability in challenging environmental conditions.
The investment in proper mounting hardware pays dividends throughout your system’s 25-year operational life. Aluminum rail systems resist corrosion, accommodate thermal expansion, and maintain structural stability far beyond generic mounting solutions. When properly installed on a metal roof, these systems can outlast the solar panels themselves.
Don’t compromise on materials or expertise. Consult with experienced mounting system manufacturers who offer custom solutions for your specific roof profile and project requirements. Their engineering support ensures optimal design before installation begins. Then engage licensed installers with documented experience in metal roof solar projects to execute the work according to specifications.
The combination of a quality metal roof, engineered aluminum mounting systems, and professional installation creates a solar array that performs reliably for decades while protecting your roofing investment.